RV slide-out floor repair and replacement: fix the leak first
A soft spot, a sagging middle or a floor pulling away from the wall means water got into your slide room. Find and stop the leak first, then decide what you can fix yourself and what needs a shop.
 By Complete RV Guide team
Updated Oct 25, 2026
9 min read
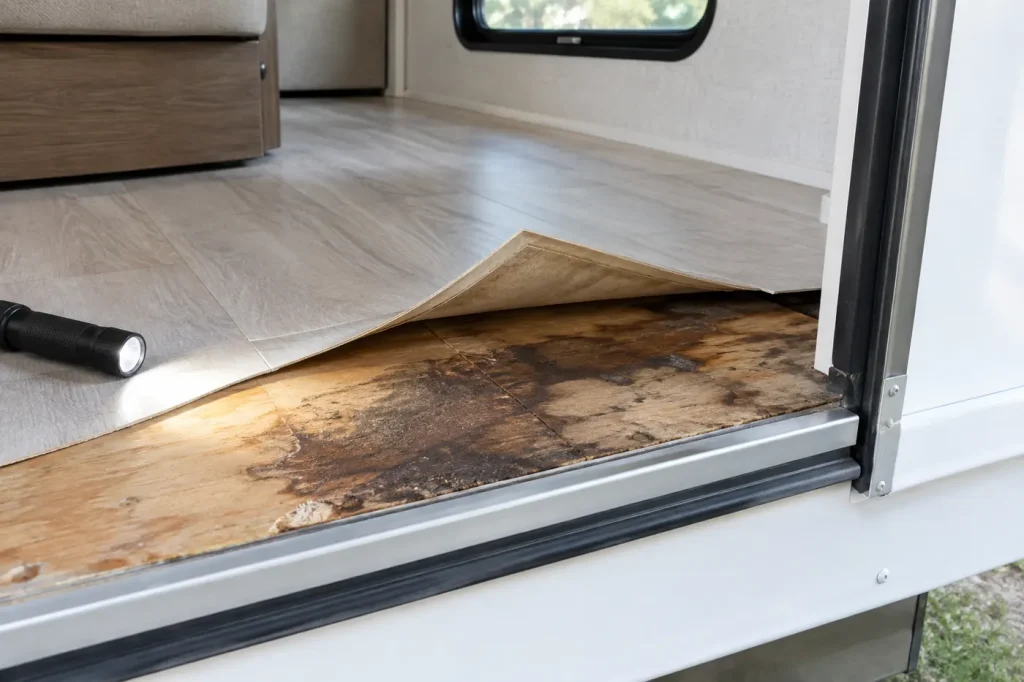
Quick answer
A soft slide floor usually means water, so find the source before you touch the floor: seals, sealant at the corners, debris on the room's roof, or plumbing in the slide. Stop the leak and dry the area within 24 to 48 hours. If the decking is still firm once dry, replacing the covering is a DIY job; soft or sagging decking is structural and needs a shop.
- Difficulty
- Hard
- Time
- 1-2 days to dry; repair time varies
- Parts cost
- VariesDepends on how much floor is damaged and whether the room must come out
What you'll need
Tool links go to Amazon. As an Amazon Associate we earn from qualifying purchases, at no extra cost to you.
Common symptoms
- A soft or spongy spot near the front edge or a corner of the slide room.
- The floor sags or bows in the middle of the room.
- Vinyl bubbles or lifts, or carpet feels damp or looks stained.
- A musty smell, or mold on the floor edge or under furniture.
- The floor pulls away from the wall, and you can see daylight at the seam.
- The room drags, or its seal catches on the floor as it moves.
Quick checks before anything else
- Feel the floor along the front edge and in the corners for dampness, right after rain if you can.
- Look on top of the room for leaves, branches or standing water.
- Check the sealant at the corners and moldings of the slide box for gaps and cracks.
- Look under any sink, fridge or ice maker line that sits in the slide.
- Shine a light under the room from outside for stains or swelling.
- Take photos and notes before you pull anything up.
Why does an RV slide-out floor go soft?
- Leaking seals or sealant Water gets in at the top or corners and runs down to the floor edge. Keystone calls poor seal and sealant upkeep the leading cause of slide-out leaks.
- Debris on the room’s roof Keystone says twigs, leaves and pine needles can lift the sweep seals and let water in.
- Plumbing in the slide A drip under a sink or at a fridge water line soaks the floor from inside.
- Water left on the room Rain on top can run inside as the room comes in. Keystone says to clear water and debris off the top before you retract.
- Stepping on a retracted slide floor Keystone says the slide floor is not supported by the main floor when the room is in, and stepping on it can damage the structure.
- Drag and wear A seal or roller that rubs the floor every trip wears the floor covering and its edge.
- Stop the waterCover the area or shut off the water, if safe
- Remove standing waterTowels or a shop vacuum
- Dry and ventilateEPA: dry wet materials within 24 to 48 hours
- Find and fix the sourceSeals, sealant, roof of the room, plumbing
- Is the floor still firm once dry?
Yes: the damage is likely in the floor covering. Replace the vinyl or carpet yourself if you like.
No: the decking (the wood or panel under the covering) is damaged. Get a shop’s diagnosis before you cut anything.
Step-by-step: RV slide-out floor repair, source first
RV slide-out floor repair starts with the water, not the wood. A new floor over an old leak will rot again. These steps follow the order Keystone’s owner’s manual gives for any leak: stop it, dry it, then repair.
-
Stop the water first Keystone tells owners to stop a leak right away, to the extent it is safe: turn off the water, or cover the area. Then remove standing water with towels or a shop vacuum. If the soaking is severe, Keystone says a professional water restoration company may be needed.
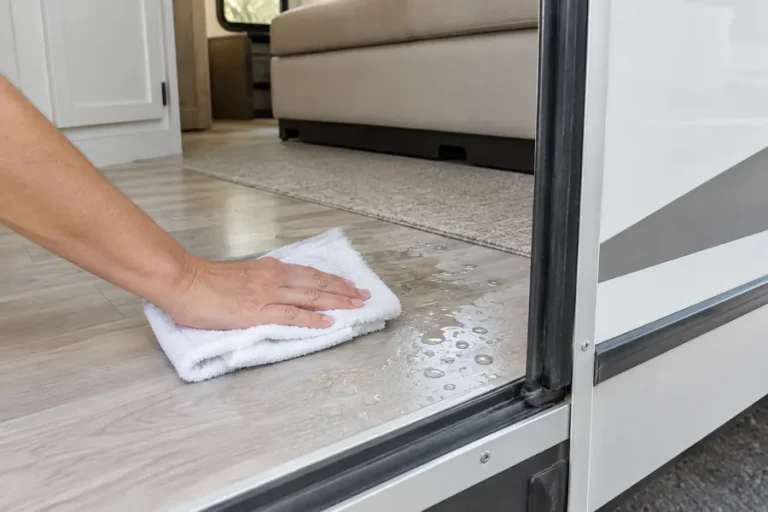
Remove standing water before it soaks in - Dry the area fast Run roof vent fans, point a fan at the wet spot, and use a dehumidifier, the furnace fan or the air conditioner. Keystone’s manual repeats the EPA’s advice: clean and dry wet materials within 24 to 48 hours to stop mold, and keep indoor humidity between 30 and 60%. If the covering is already loose at the wet edge, lifting it lets air reach the decking.
- Find where the water comes in Look at the room’s roof for debris, standing water and tears in the membrane. Check the sealant on the corner moldings, the window in the slide, and the sweep seals. Check any plumbing inside the slide. If the floor is only wet when the room is out, or only when it is in, our guide to an RV slide-out leaking shows which seals to check for each. If your water pump cycles with every faucet closed, a hidden plumbing leak is likely; see why an RV water pump keeps running.
- Fix the source before the floor Reseal gaps and replace torn seals first. Keystone says to use the same type and brand of sealant as the original, or remove all the old sealant and start fresh, because two different sealants may not bond. Keystone also says not to use any silicone product on the roof material. Let new sealant cure before you wash the RV.
- Check your warranty before you tear anything out Keystone’s structural warranty, for example, lists the slide-out box floors and decking. It also says damage from failure to maintain, or from leaks the owner did not act on, is not covered, and mold is not covered. Read your own RV maker’s warranty, and keep your photos and notes. Have your VIN (vehicle identification number) ready when you call.
-
Map the damage once it is dry Press along the floor with your hand and mark where it feels soft. Check the underside from outside. If only the covering was wet and the decking under it is firm and dry, you have a surface repair. If the decking is soft, crumbly, swollen, or the floor sags or has pulled away from the wall, the damage is structural.
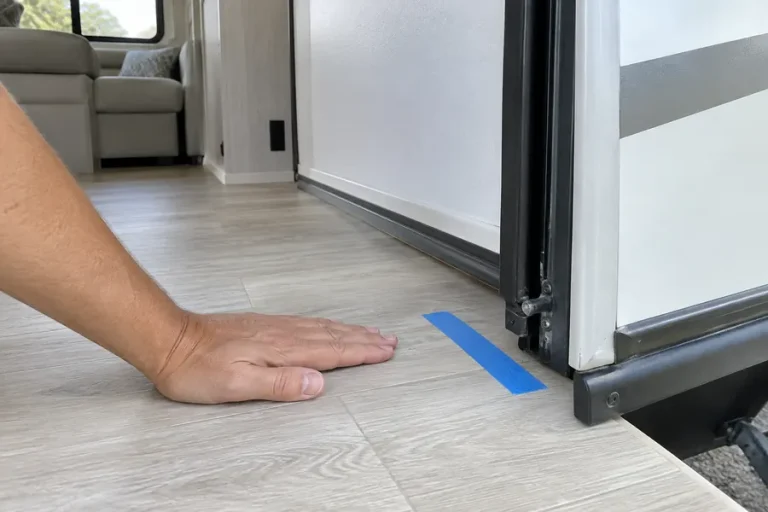
Mark every soft spot before you get quotes - Do the surface repair yourself Replacing wet carpet or vinyl on firm, dry decking is a fair DIY job. Keystone advises against rubber-backed mats on vinyl because they can stain it, and recommends mats with PVC, polyurethane or textile backing. Keep new flooring and rugs from building up at the front edge, where the room and its seals pass over. Lippert lists carpeting among the things that can block a slide.
- Leave structural repairs to a shop Soft decking is part of the room’s structure, and the slide mechanism is fastened to the room. The repair may mean taking the room apart or out of the RV and resetting the mechanism after. Lippert’s hydraulic through-frame manual says room adjustments must be done by certified technicians.
- Check the room after any repair Lippert’s through-frame manual lists what to check after service: the outside seals press tight when the room is in, the inside seals press tight when it is out, and both sides move together and smoothly. If the room now drags, binds or stops, our slide-out troubleshooting guide covers the next checks.
Stop. Disconnect the batteries before you work on or under a slide room. Keystone and Lippert both warn that the room and its mechanism can crush. Never stand on a retracted slide floor. Lippert says the slide system is meant only to move the room, so never use it to lift or support a repair.
Differences by slide type
The drive system changes what a floor repair involves, so know which one you have before you get quotes.
Through-frame and hydraulic. The room rides on tubes or rails that pass through the RV’s frame under the floor. A floor repair can mean separating the room from that mechanism, and Lippert says the room adjustments afterward are certified-tech work.
SlimRack. The drive sits in the side walls and the floor stays flush with the main floor. Lippert’s SlimRack manual says floor rollers support the room’s weight while it moves, and only Lippert-approved rollers can be used. If a repair raises or changes the floor, the rollers and seals have to still line up.
In-wall (Schwintek). The motors and gear racks are in the side walls. Lippert’s quick sheet lists a wiper seal caught in the floor, or on the V-rollers, as a cause of stalls. A swollen or lifted floor edge can do the same thing, so check it if the room started stalling after a leak.
What drives slide-out floor replacement cost?
We won’t quote a number, because there isn’t an honest single one. Parts vary by RV maker and model, and shops bill labor by the hour. These things drive the price up or down:
- How far the rot spread: one corner or the whole floor.
- Whether the framing under or around the decking is also damaged.
- Whether the room has to come out of the RV.
- The leak repair itself: seals, sealant or a roof membrane patch.
- The floor covering, and furniture or appliances that must come out.
- Resetting and adjusting the slide mechanism after the repair.
Ask for a written estimate that names the leak source and the repair for it. A quote that only replaces the floor leaves you exposed to the same damage again.
When to call an RV tech
- The decking is soft, the floor sags, or it has separated from the wall.
- The room drags, binds or stalls since the damage started.
- Mold covers more than a small area, or keeps coming back.
- You cannot find the source of the water.
- The RV is under warranty. Call the dealer before you open anything up.
For how slide systems work and which parts fail, see our RV slide-out repair guide.
Common questions
How much does it cost to replace the floor in an RV slide-out?
It depends on how much of the floor is damaged and whether the room has to come out. New vinyl on firm decking costs far less than structural work. Labor is hourly and parts vary by model, so get a written estimate that includes fixing the leak.
How do you replace the floor in an RV slide-out?
First stop the leak and dry everything. Then a surface repair means replacing the covering on firm decking, which many owners do themselves. Structural replacement means opening up the room and often removing it from the mechanism, and we have not found a published step-by-step from Lippert or the RV makers we checked. Get the method for your exact model from the dealer, with your VIN.
What material is used for an RV slide-out floor?
It varies by maker and model year. Keystone’s warranty, for one, describes floors as laminated or non-laminated with decking and joists, and lists the slide-out box floors among its structural parts. To know yours, check the RV maker’s owner’s manual or ask them with your VIN. The same goes for floor thickness: measure an exposed edge or ask the maker rather than guess.
What is the best flooring for an RV with slide-outs?
Pick a covering that stays flat and low at the edge where the room passes over it. Lippert lists carpeting as a possible slide obstruction, and Keystone warns that rubber-backed mats can stain vinyl. Check the room clears the new floor before you run it all the way.
How hard is it to replace a floor in an RV slide-out?
A covering-only repair is a moderate DIY job. Replacing rotted decking is hard: the room is heavy, its mechanism attaches to the room, and the alignment afterward is tech work. That is why we send structural floor repairs to a shop.
Can I fix a soft spot without removing the slide room?
Sometimes, if the damage is small and reachable, but a shop has to judge that in person. Either way, fix the leak and dry the area first.
Sources
- Keystone RV Owner's Manual (2027): warranty, leak mitigation, slide-out and sealant care
- Keystone RV: Essential RV Slide-Out Care, maintenance tips from Keystone technicians
- Lippert In-Wall (Schwintek) Slide-Out Troubleshooting Quick Sheet, Rev 09.09.20 (Forest River hosted copy)
- Lippert SlimRack Slide-Out Owner's Manual, CCD-0001459 (Forest River hosted copy)
- Lippert Hydraulic Through Frame Slide-Out Owner's Manual, CCD-0001616 (Forest River hosted copy)