RV toilet leaking at the base or from the foot pedal
There is water on the bathroom floor, at the foot pedal, or dripping behind the toilet when you flush. Here is how to tell a supply-side leak from a floor seal leak and fix the right part.
 By Complete RV Guide team
Updated Oct 25, 2026
8 min read
Quick answer
First find which side is leaking. Water at the back of the toilet or at the pedal usually comes from a loose water line, a frozen water valve or the vacuum breaker. Water only at the floor after flushes points to loose mounting nuts or a worn floor flange seal, so check the nuts before you pull the toilet.
- Difficulty
- Moderate
- Time
- 15-120 min
- Parts cost
- Often $0A floor flange seal, water valve or vacuum breaker kit varies by model
What you'll need
Tool links go to Amazon. As an Amazon Associate we earn from qualifying purchases, at no extra cost to you.
Common symptoms
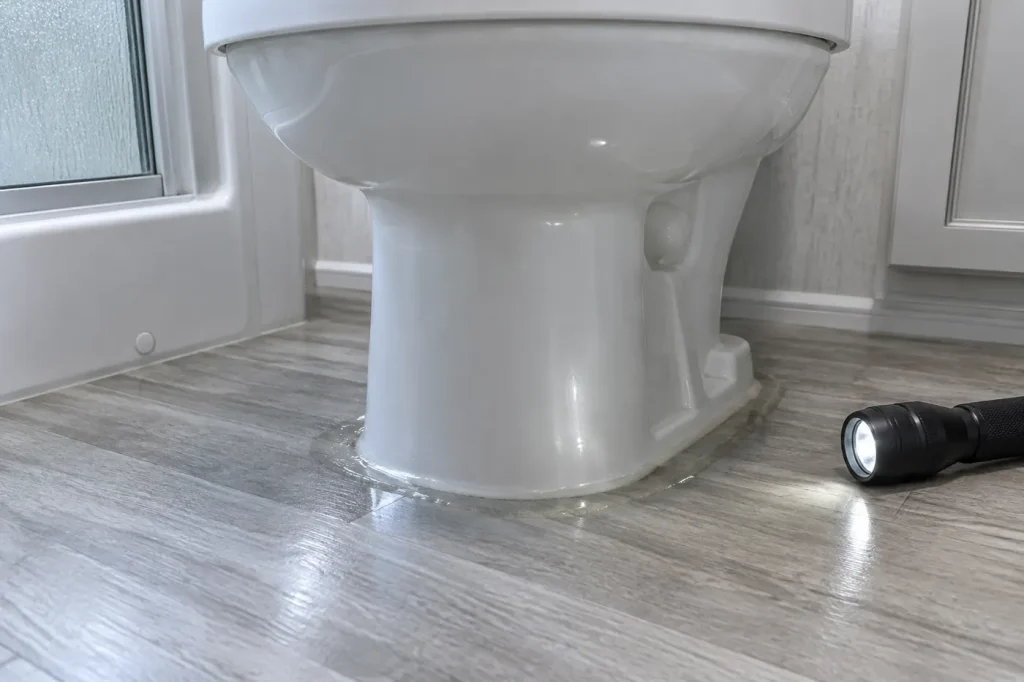
- A wet floor or a ring of water around the base of the toilet.
- Water running down the back of the toilet, or dripping behind it.
- Water pooling at the foot pedal.
- A spray or drip from the back only while you flush.
- A drip at the water line where it meets the toilet.
- A sewer smell close to the floor.
Quick checks before anything else
- Dry the toilet, the floor and the water line completely with paper towels.
- Have someone flush while you shine a flashlight behind the toilet.
- Wrap a dry tissue around the water line fitting and see if it gets wet without a flush.
- Rock the toilet gently by hand. It should not move.
- Sniff the water. Clean water points to the supply side; a sewer smell points to the floor seal.
- If the toilet sits in the shower, check whether shower water runs under the base.
Where is an RV toilet leaking from?
An RV toilet has two separate water paths, and a leak in each looks different. Clean water comes in through the supply line, the water valve and the vacuum breaker at the back. Waste goes down through the bottom of the bowl, past the floor flange seal and into the black tank. Find which path is leaking and you know which part to fix.
- Loose or cross-threaded water line A drip at the back that is there with or without a flush.
- Damaged water valve A drip from the valve itself, often after a freeze.
- Loose or failed vacuum breaker Water sprays or drips from the back of the bowl during a flush. A vacuum breaker is the small part that stops toilet water from being sucked back into your fresh water.
- Loose mounting nuts The toilet rocks, and water seeps out at the floor after flushes.
- Worn floor flange seal Water at the base, often with a sewer smell.
- Cracked bowl Rare, but it leaks no matter what you tighten.
Step-by-step: find and fix the toilet leak
When your RV toilet is leaking at the base or from the bottom, work from the back of the toilet down to the floor. Dometic says to always turn off the water supply before you repair a plumbing fixture. On the pump, that means switching it off. On city water, close the tap at the hookup.
- Find the wet spot With everything dry, turn the water back on and wait a minute. Then have someone flush while you watch the back of the toilet with a flashlight. Water at the back before you flush is the supply side. Water at the back only during a flush is usually the vacuum breaker. Water that shows up only at the floor after flushes is the floor flange seal or loose mounting nuts.
-
Tighten the water line connection For a leak at the water valve, Dometic says to make sure the threads are not cross-threaded, then tighten the connection. On the 310 and 320, Dometic gives 30 to 40 inch-pounds for this connection and says not to overtighten. That is snug, not forced. Thetford’s fix for a leak at the back of the toilet is the same: resecure or retighten the supply line at the water valve.
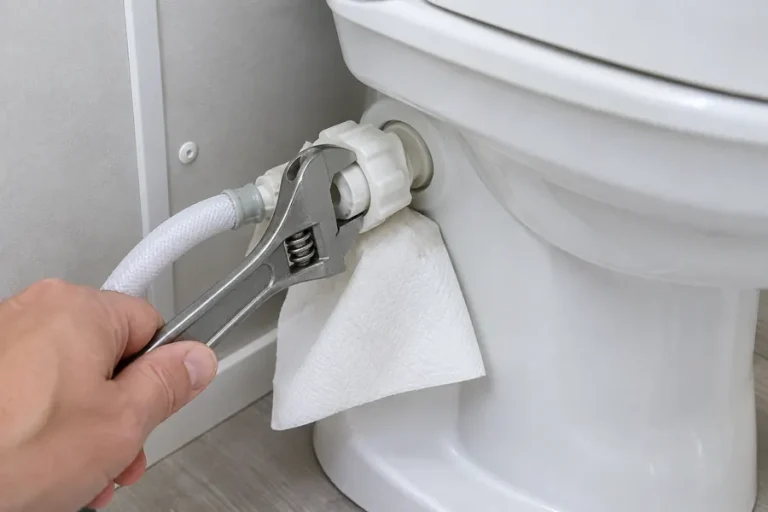
Snug, not forced; Dometic says not to overtighten - Check the supply hose and clamps Dometic lists a damaged or defective supply hose as a cause of water leaking from the rear of the toilet. Tighten the supply hose clamps. If the hose is cracked or soft, replace it with the one made for your model.
- Seat or replace the vacuum breaker On Dometic 310 and 320 toilets, make sure the vacuum breaker stem is pushed fully into the sealing grommet in the back of the bowl. On the 300 series, it must be firmly connected to the rim jet. If it is cracked or still leaks, replace it. Thetford says a vacuum breaker that leaks while flushing must be replaced, either the vacuum breaker or the water module, depending on the model.
- Look at the water valve for freeze damage Dometic water valves have a freeze damage indicator window. White stress marks in it mean the valve froze and needs replacing, and Dometic’s warranty does not cover freeze damage. The water valve on a Dometic 300, 310 or 320 snaps in and out with the toilet still on the floor, following the kit instructions. On a Thetford, if the leak persists from the water valve after tightening the line, replace the valve.
- Trace a leak at the foot pedal The pedal does not hold water. Water there has almost always run down from the water line, water valve or vacuum breaker above it, so dry everything and repeat step 1. If your toilet has a hand sprayer, check it too: Dometic says a leaking sprayer needs replacing. Dometic also says not to remove the foot pedal from the base.
- Tighten the mounting nuts If the toilet rocks, or water seeps out at the floor, Dometic and Thetford both say to check the nuts that hold the toilet to the floor flange first. On the Dometic 310 and 320, the nuts take 30 to 40 inch-pounds, tightened a bit at a time side to side so the base does not distort. Thetford says to tighten until the toilet is stable. Neither wants them overtightened.
- Replace the floor flange seal If the base still leaks, the seal under the toilet has worn out. Dump and rinse the black tank first. Turn off the water, disconnect the supply line, remove the nuts and lift the toilet straight up. Clean the top of the flange so it is free of debris and old sealant, as Dometic says. Fit the new seal to the toilet base, set the toilet so its outlet sits inside the flange hole, and tighten the nuts as in step 7. Reconnect the water and flush several times to check for leaks.
- Check the flange height and mounting While the toilet is off, look at the flange. Thetford says its top should sit 7/16 inch above the floor and sells spacers to adjust it. Dometic calls for a flange with a 3 inch inside diameter that is 1/4 to 7/16 inch thick, fixed to the floor with at least four screws, and eight is better. A loose or cracked flange will keep leaking under any new seal.
- Seal the base in a shower If the toilet stands in a shower stall, Dometic says to run a bead of caulk around the base to keep shower water from seeping under it. Without it, shower water on the floor can look just like a toilet leak.
Stop. Sewer gas from the black tank can make you sick in a closed space. Dump the tank before you lift the toilet, open a window, run the vent fan, and wear rubber gloves and eye protection. If the floor around the toilet feels soft, stop and have it checked before you set the toilet back down.
| Where you see water | Likely part | Fix |
|---|---|---|
| Back of toilet, all the time | Water line or water valve | Steps 2, 3 and 5 |
| Back of toilet, only while flushing | Vacuum breaker | Step 4 |
| At the foot pedal | Water running down from above | Step 6 |
| At the base after flushes, sewer smell | Mounting nuts or floor flange seal | Steps 7 to 9 |
| At the base after showers | Shower water under the base | Step 10 |
Dometic vs Thetford: what differs for leaks
Dometic 300, 310 and 320. The ceramic bowl and plastic base are sealed at the factory, and Dometic says never to separate them. The water valve, flush ball seal and vacuum breaker are sold as kits. On the 310 and 320 the vacuum breaker pushes into a grommet in the back of the bowl, and on the 300 it connects to a rim jet. If water leaks from the rear and the bowl itself is cracked, Dometic’s fix is a new toilet. The model label is on the base under the water valve.
Thetford Aqua-Magic V. A lighter plastic toilet. Its vacuum breaker or water module is replaced as an assembly when it fails, and Thetford’s manual gives flange height as the key check for leaks at the floor. Record the model and code from the product ID label, and whether it is high or low profile, before ordering parts.
For specs and how the toilet and tanks work together, see our RV toilet problems guide.
When to call an RV tech
- The floor is soft, stained or spongy around the toilet. Water may have reached the subfloor.
- The floor flange is cracked, loose from the floor, or the pipe below it is damaged.
- The black tank won’t drain, so you cannot lift the toilet safely.
- Several lines froze and the leak is under the floor rather than at the toilet.
Not sure the water is coming from the toilet? Start from the symptom in our RV problem finder.
Common questions
Why is my RV toilet leaking from the base?
Most often the mounting nuts are loose or the floor flange seal is worn. Check the nuts first, then replace the seal if it still leaks. Also check that the water isn’t running down from the water line at the back, or coming from the shower.
Why does my RV toilet leak when I flush it?
If water sprays or drips from the back during a flush, the vacuum breaker is loose or failed. Dometic says to push its stem fully into the grommet, then replace it if needed. If water appears at the floor after flushing, the floor flange seal is leaking.
My RV toilet foot pedal is leaking. What can I do?
Look above the pedal. The pedal carries no water, so the leak is usually the water line, water valve or vacuum breaker dripping down onto it. Tighten the water line connection, check the valve for freeze damage, and seat the vacuum breaker.
Why is my RV toilet water valve leaking?
Either the water line is loose or cross-threaded, or the valve is damaged, often by freezing. Tighten the line first. If the leak continues, or the Dometic freeze window shows white stress marks, replace the valve. If the valve leaks into the bowl instead, the bowl keeps filling and your pump may cycle, which our guide to an RV water pump that keeps running covers.
Can I use a wax ring on my RV toilet?
We would not. Dometic and Thetford each sell a floor flange seal made for their toilets, and Dometic’s is nitrile rubber and foam. Use the seal kit for your model. If the bowl is leaking water into the tank rather than the floor, see our guide to an RV toilet that won’t hold water.
My Dometic RV toilet is leaking between the bowl and the base. What can I do?
Do not try to separate them. Dometic seals the bowl to the base at the factory. Water there usually comes from the vacuum breaker at the back of the bowl, so seat its stem fully in the grommet or replace it. If the bowl itself is cracked, Dometic says to replace the toilet.
Sources
- Dometic 300, 310, 320 Series Gravity-Flush Toilet Installation and Operation Manual, Form 600346504 Rev D (Oliver Travel Trailers hosted copy)
- Dometic 310 and 320 Series Gravity-Flush Toilets Instruction Manual (Newmar hosted copy)
- Thetford Aqua-Magic V Permanent RV Toilet Owner's Manual, Form 42088 (Newmar hosted copy)